On this page
Configuring the Event Tile
What’s New?
In Release Version 2.1

Improvement: Redesigned narrow column view in to make the Events tile smaller in size. No change was made to the wide column. The preview will show just the wide column. Note: In order to keep the size of the text in proportion for the narrow column, we hard-coded those font sizes.
Updated Google Analytics component to support GA4 Analytics
Corrected some bugs regarding display, and also reviewed for accessibility compliance.
Installing Your Tile – Current Version 2.1 Note: In the Add-ons page, you can click on the Configure Now link to access the Global Settings for the Tile. Here, you can determine as an admin whether “add to Outlook, Google Calendar and/or ICS files” are available for the tile. If you choose those to be available, then, in the configuration panel, you can choose per tile whether to allow it. |
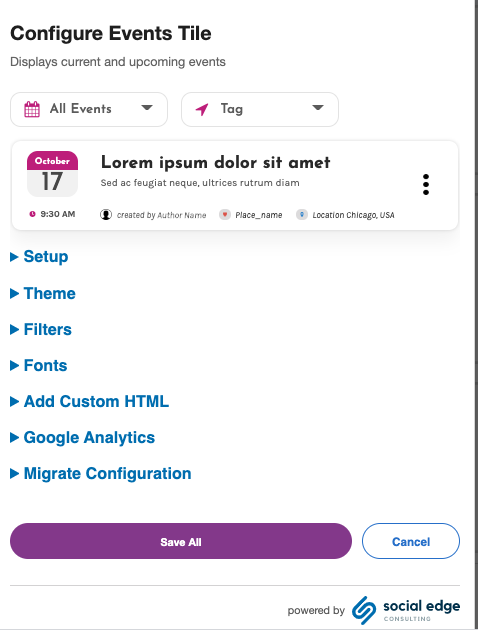
Now that you added the tile, it will be automatically in edit mode.
To access the tile’s configuration panel for editing in the future, click the gear icon in the upper right corner of the tile.
(Note: In this screenshot below, the tile has already been configured previously and is showing a preview at the top of the panel)

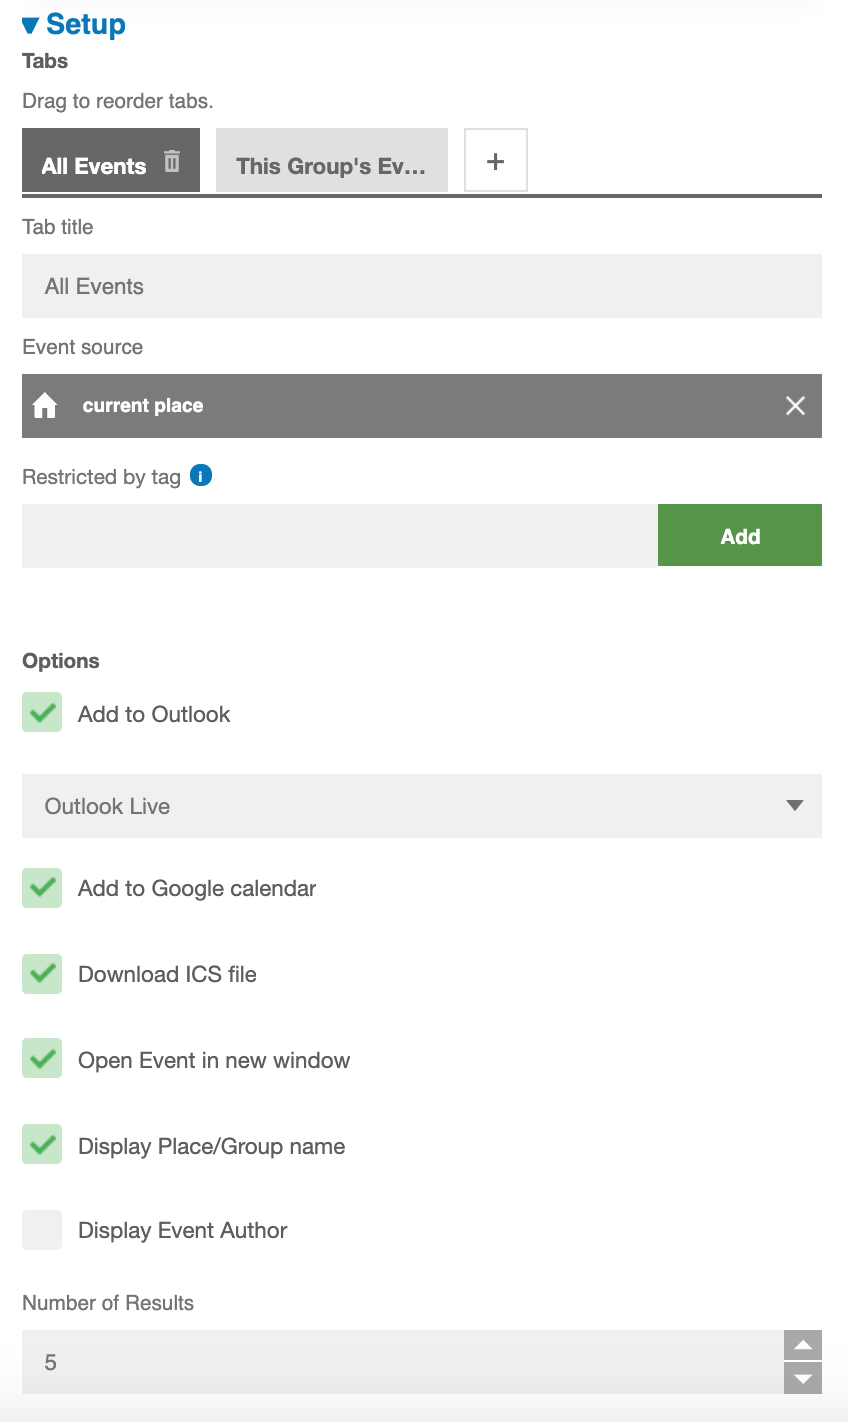
Configuring the Setup

Add the Tile header
Add a tab. There is no limit to the number of tabs you can add, however they will collapse to a drop down depending on the number and column size.
Add your Tab title
Select the event source. You can select a place in your community from which you want the events to display. Choose from:
Search for a place
Current place (place where you are adding the tile)
All events
Decide on what appears in the event listing including ability to add to a calendar such as Outlook (either Office or Live), Google Calendar and/or ICS file; the place name, event author and whether clicking on the event opens in a new window

Decide how many results to display at a time.
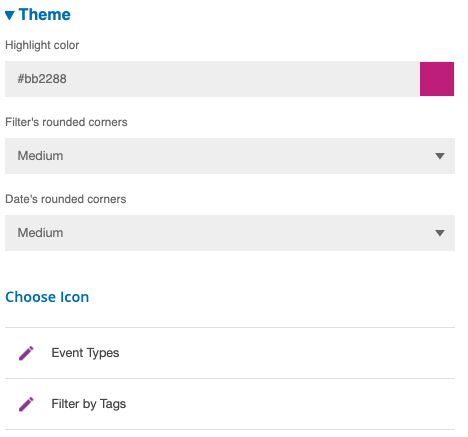
Configuring the Theme

For the theme:
Select your highlight color
Note: You can type the basic colors into each color field. For example, red, blue, green, brown, black, white, yellow, purple, orange. For other colors, you can enter hexadecimal values. If you don’t know the hexadecimal value, convert your colors at http://rgb.to.Decide if you want the filter drop down button on the tile to have rounded corners and to what degree. The default is none (meaning the button is rectangular in shape).
Decide if the date icon on the tile will have rounded corners.
For the icons:
For the icons that appear in the buttons, click on the edit pencil and decide if you want a preset icon (from Font Awesome) or your own custom icons. If using preset icons, you can choose from the drop down or type in the name of an icon you’re looking for. For example, calendar. Otherwise, click on the “icon guide” for more ideas.
Save your changes as needed.
Scroll to the bottom of the tile and click the Save All button.
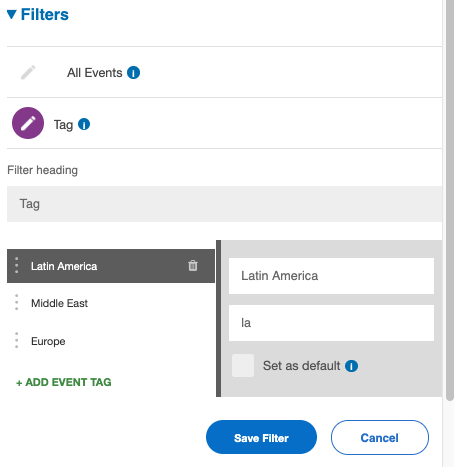
Configure Filters
To help users sort through all displayed events, you may pre-define several tags, grouped as Filters. There are two main filters being used for this tile. These will allow your community members to choose how they want to see the results of the events:
Event Categories
These are event categories managed in the Jive admin console.
These are only available for clients using the Cloud version of Jive. However, if you’re on hosted, you can still make use of the next filter, which are tags.
Tags
For our design, we are calling these Location since most users will want to filter that way, however you can label this something else if you prefer
As a best practice, first establish a set of tags that you want to use, tag some events first, and then add to the configuration panel. For example, if you want to filter by region, create unique tags such as event_north_america or event_asia_pacific.
Display name for tags: You can write a friendly name for each tag. For example, your tag may be “so-cal” but your displayed tag can be “Southern California.”

Configure Fonts
Learn more at How to Configure Fonts |
Configure Add Custom HTML
Learn more at Configuring Custom HTML for how you can add a custom look to either or both above and below your tile. |
Configure Google Analytics
Learn more at How to Configure Analytics |
Migrate Configuration
The Migrate Configuration option allows you to copy the Tile settings you have created from another I Tile in this Jive community and add it to a new Ideas Tile in a different place in the community. This feature will save all the settings and stories you add.
Learn more at How to Copy Your Tile Settings aka, Migrate Configuration Settings |
Best Practices and Tips
Best Practice/Tip | How To… |
Backup | Copy all CSS and HTML, including the code in the Migrate Configuration options to a text editor. Save this file locally or to a cloud storage system. |
Keep it clear | Use clear, brief titles for your ideas so that they appear in the Idea Tile cleanly and don’t overwhelm the user/page. Too many tabs or long titles in tabs will turn into a drop-down list even in the large column. |
Tag filter Logic | The Tag filter logic has a strict condition: OR. If the idea contains at least one configured tag, it will be displayed. Please note that tag names are case-sensitive. "DEMO TAG" not equal "demo tag". |
Save time with the new Inherit font feature. | You can copy your font settings to other tabs for the tile. Note:
|
Support
Need support or want to talk to us? Please send an email to:
support@socialedgeconsulting.com