General Instructions
Note: Below is Jive's documentation for uploading Add-ons, which includes a tile.
You can build your own add-ons to leverage systems in Jive. Once you build the add-on, upload it to Jive using the Add-ons page.
When you first upload an add-on to your community, we recommend that you first restrict its visibility to yourself and test out your tiles by creating a secret group for them. This strategy reduces the impact on your community and gives you a chance to preview your add-on without setting up an entirely separate test environment.
To upload an add-on:
Click your avatar in the top right, and select Add-ons.
From the Add-ons tab, select All Add-ons > Upload Package.
Click Browse to find the .ZIP package.
If you are not ready to publish this add-on to your community, select this service is visible only to me.
To test your add-on, create a secret group and experiment with your add-on functionality before making it available to everyone in your community.
To push your add-on into the community:
If you uploaded your add-on using the "This service is visible only to me" option, then you need to publish it to your community. This allows others in your community to use the tiles and/or templates provided by your add-on.
Click your avatar in the top right, and select Add-ons.
From the Add-ons tab, select All Add-ons > Installed.
Click the gear icon next to the add-on that you're interested in.
Select to make the add-on visible to the entire community.
When the Permit All Users Access to this Add-on dialog opens, click Uninstall.
Visit Jive Core Help to view this documentation on Uploading Your Own Add-ons
New for Tiles using Multi-language preference display features
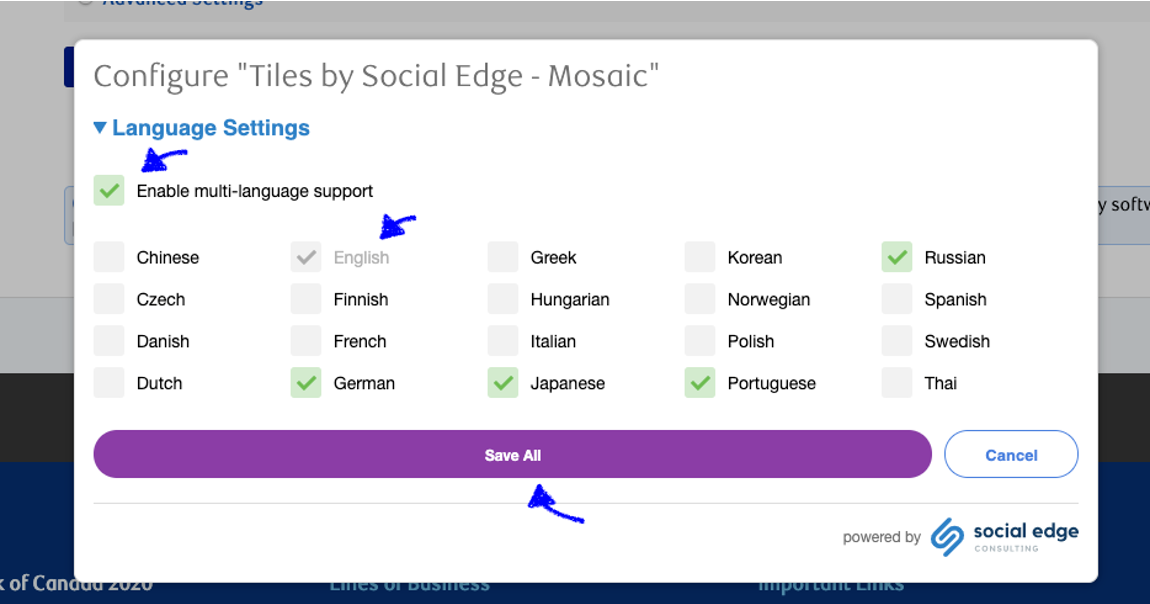
We've introduced an Add-on configuration panel to enable language support in tiles.
It allows you to set the languages your tile managers can use in their tiles, so that they are not overwhelmed by all the language possibilities
Once enabled, tile managers can create a Mosaic, Blog Tile for each language enabled (the default if is not set is in English)
To the end-user, they will see the Mosaic that matches their Language preference
What it doesn’t do
Nothing is automatically translated. All content in other languages is part of the content or translated by the tile administrator
Does not change other elements on the page
Does not detect a user's browser language, it only uses Jive Preference
This supports all languages on Jive 9 and Jive cloud except Arabic and Hebrew which are right-to-left (RTL) languages
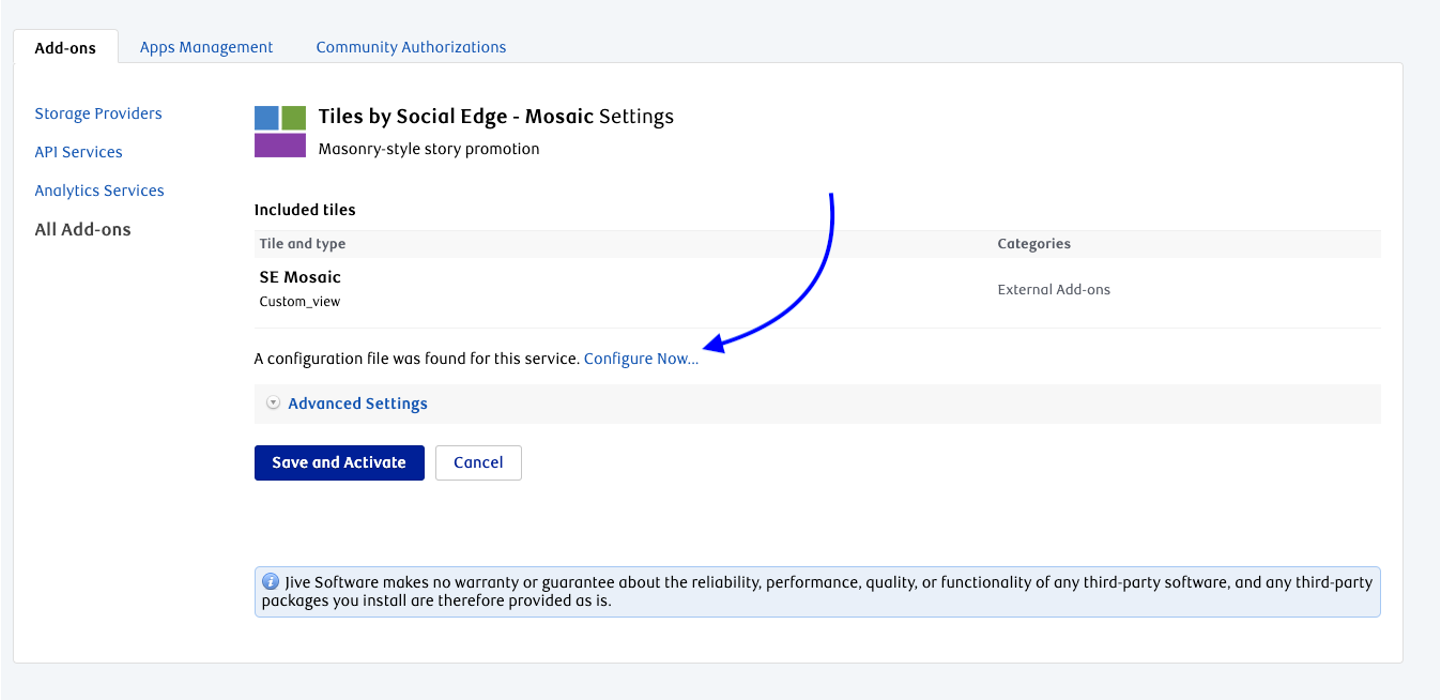
Once you’ve installed the tile, click on the Configure Now link.
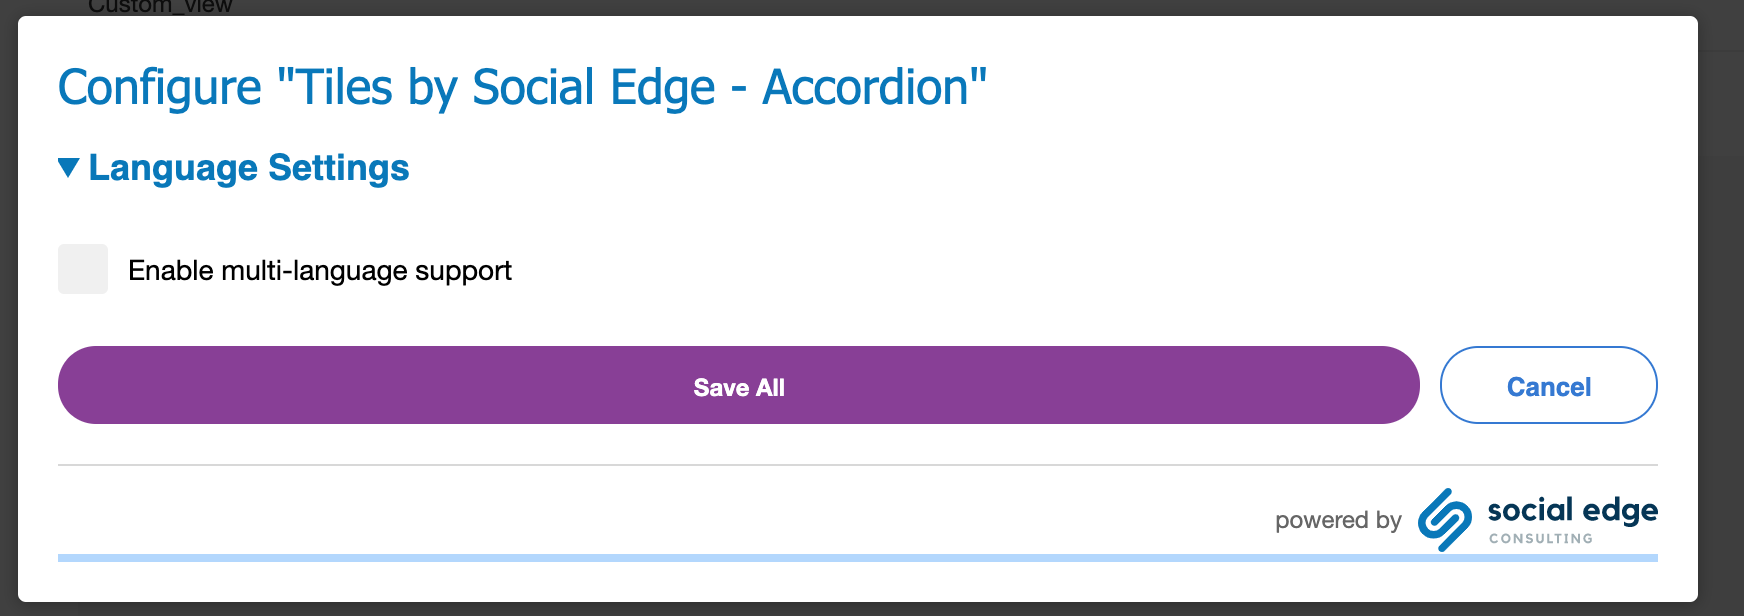
Then, check to enable multi-language support, select which languages you want and then save all. You can then configure the tiles that have this feature enabled.