On this page
| Table of Contents |
|---|
| Info |
|---|
Current Version: #11.1 |
About Keyword Alerts
With the Keyword Alerts, you can set up notifications when a product or platform is being discussed to ensure that discussions and questions are answered by your SMEs. Simply set up a keyword alert and the SME you specify will automatically receive an email with the keyword and link to the discussion, so they do not miss a thing.
Key Features include:
List keyword(s) that you can create alerts for.
You can add, modify, or remove keywords from the plugin at any time.
The plugin allows for many alerts to be set up per community and individuals
Email address for the alert recipient(s) associated with each keyword.
Custom email template that you can customize with your own language and organization's branding
For example, you could set up an alert for the keyword "GDPR Regulations" and have the notification sent to the email addresses gdprsupport@mycompany.com and/or john@mycompany.com. In this example, if the phrase "GDPR Regulation" is mentioned in a discussion, the SME is immediately sent an email and can respond and/or add additional detail as needed.
Configuration instruction Plugin Installation Instructions
Go to the homepage of your instance
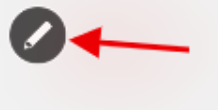
Choose the pencil on the top right corner
Chose the “Administration” button
Type “interceptor” in the search bar to find the plugin
Choose the “Forum Create Interceptor Plugin” button to go to the email template
Check the box “Enabled,” Type the same Email address you have in Site>Email Options in the “From Email” and click “Save”


Choose “Templates” Tab
Press “Forum interceptor email template for notifications” section
In the RTE edit the email template
Press the “Save” button to save your changes
Create Keyword Rules
Navigate to the Administration Console
Select the Pencil in the top left corner of the screen
Select Administration
Search for Keywords
Select the Keywords Rule
Switch on the “interceptor” plugin
Press the “Save” button to save your changes
Press the “+Rule” button to add the rule
Fill all fields
Description of the fields and control elements
When fields were filled press the purple "Save" button AND the blue “Save” button
Import the Roles from a CSV File (Optional)
For importing the roles from the “.csv” file press the “Choose file” button(optional)
Choose csv file
Press “Send” button – Here is the view of the CSV file which was uploaded:
Refresh the page (press button on the keyboard)
Click the “Save” button
To Test Rules
Navigate to any group
Create a piece of content, reply, or comment
Use a keyword you have a rule for
Check your email for the Keyword Email that was used
Support
Need support or want to talk to us? Please send an email to: support@socialedgeconsulting.com
Stay up to date on our products. Become a member of our community at https://www.socialedgeconsulting.com